Boho IKEA Gladom Hack: Anthropologie-Inspired Table
by Mia M.
Why hello there, beautiful people – how are we all doing on this fine, fine day? (I actually don’t know if it’s a fine day at all. Maybe it sucks. Maybe the world’s coming to an end. Let’s not go down that rabbit hole. Not today, existentialism, not today.)
Today, I wanted to share one of my favourite recent DIY projects with you . . . and, in true Youtube-has-got-to-me style, it’s a boho IKEA hack. Let me show you.

If you remember my DIY/Crafting Bucketlist Set-Up, you may remember the inspiration behind this table was to create a plant stand. And, if you don’t remember that, isn’t it convenient we’ve got that video there for you to watch! It’s a good time – we talk about all the upcoming crafts you guys have to look forward to.
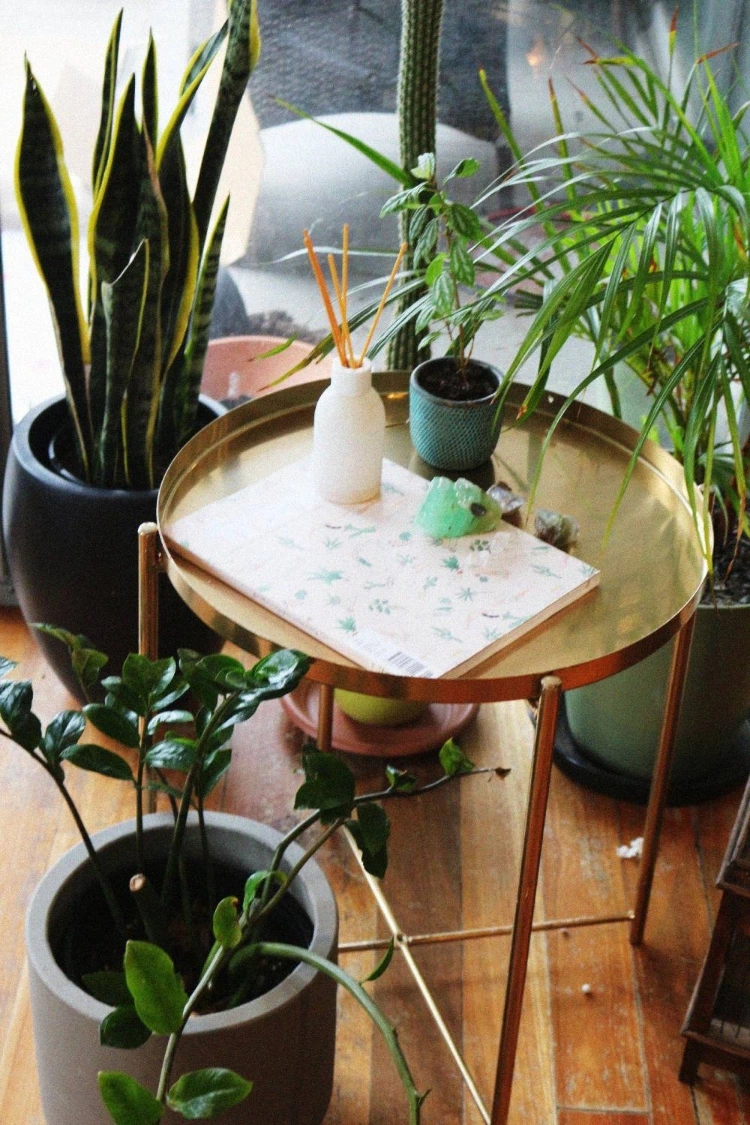
So. This table – isn’t it stunning? I was loosely inspired by this agate table from Anthroplogie – and I really mean loosely because, quite frankly, I find that table ugly. But the idea of a crystal table top? Well, that was intriguing.

That idea combined with how beautifully my agate-inspired resin tray turned out led us to this bad boy! I’ve actually ended up using it as a skincare table next to the mirror in my office.

The original IKEA table we’re flipping? This old thing. It’s an inoffensive design, for sure, but a bit . . . meh. (That said, it is priced very much non meh. I paid AUD$20 for this, which is like £10.) A really cool design feature is that the top is removable – so it’s not only a table, but also works as a tray!


But enough gabbing – you guys want to know how we’re making.
WHAT YOU NEED:
- IKEA GLADOM table
- Gold spray paint – Amazon US – $14 // Amazon UK – £9
- Acrylic paints in colours of your choosing (I used a mix of orange, burnt pink, white and gold.)
- Epoxy resin kit – Amazon US – $23.99 //
- Mixing containers (one for each colour you’ll be using)

HOW TO HACK THE IKEA GLADOM TABLE:
- Spray paint the disassembled legs and tray top of the table gold. Leave to dry for an hour. You’ll need to turn the pieces over a few times to make sure you’ve got even coverage from every angle.I actually really liked how the table looked with just a coat of gold paint, so decided to take some pics! If you’re after a more minimal finish, even just spray-painting gold is a great transformation.
- Once dry, move the tray top to a covered surface. (Emphasis on the covered. I’ve said this before and I’ll say it again – resin is a bitch to clean. Save your kitchen counters, whip out some cardboard.)
- Put your (tightly sealed) epoxy resin bottles in a bowl of warm water. (Even at room temp, resin is usually too cold and will harden with loads of frustrating little bubbles. Keeping it warm means you get the flawless, bubble-less finish.) I like to do this before I set everything up so the resin has time to heat.
- Mix your resin to whatever ratio your kit specifies (mine is 2:1) in a large container.
- Split your resin into each of the smaller containers, add a drop of acrylic paint to each container and mix, mix, mix! You should now have a container of resin in each of your chosen colours.
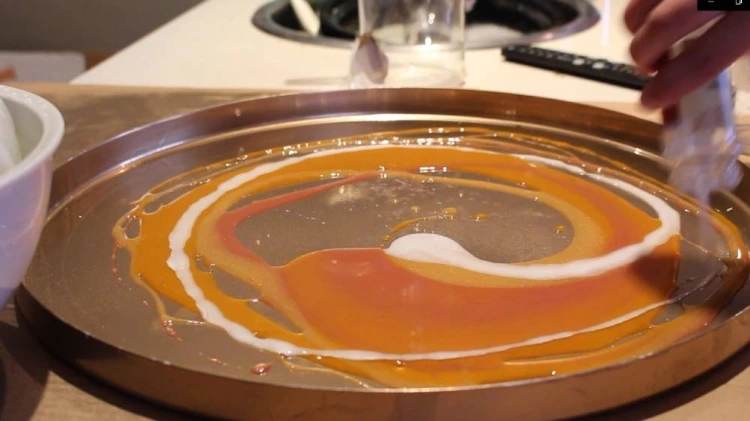
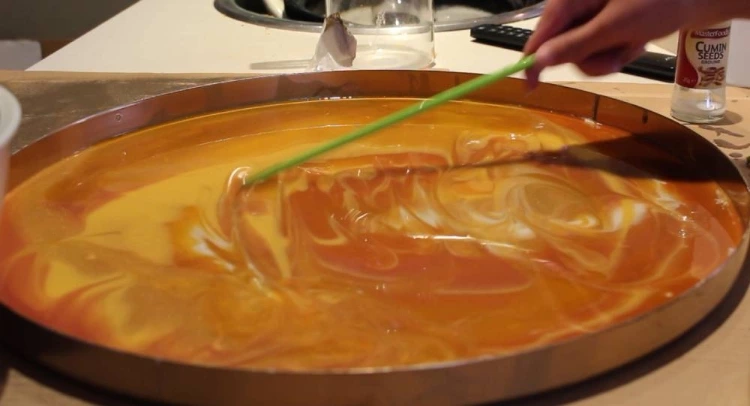
- This is the fun part! Start to layer your resin colours and swirl them together to get that multi-dimensional, crystal look. For this step, I swirled each colour into the tray in a spiral then used a stick to slowly lap them together. The great thing about mixing acrylic paint with resin is that it causes it to harden quicker, so you don’t have to worry too much about the colours running.
- Leave to set for 24 hours. It’ll harden way quicker than that, courtesy of the acrylic paint, but just to be safe I’d leave it for the full 24 before you place anything on it.
- Place the tray back on the table legs. And enjoy the product of your hard work!


While this may sound like a lot of steps, I promise this is actually a super easy craft to recreate. And the pay-off? Gorgeous. As with most of my crafts, the fun thing about this table is how customisable it is. You can use whatever colour palette you prefer – I’m half tempted to make a slate-inspired, monochrome one for my boyfriend!

If you loved this boho-twist on a basic IKEA buy, make sure you Pin this to try it later! And, of course, that you’re following my DIY board on Pinterest. It’s a good time.
Alright, my loves, that’s it for today. I hope you enjoyed the finished product as much as I did – for a cheap IKEA table, I think we ended up with something that looks way more fancy! Would you recreate this yourselves? What colours would you use? Let me know your thoughts down below!
Peace,

Instagram // Twitter // Bloglovin’ // Youtube // Pinterest
 |
 |
 |
 |

About Mia M.
Mia M. runs Beautiful Inspiring Creative Life, a personal blog covering DIY projects, bullet journaling, stationery, fashion finds, and interior inspiration. Her writing takes a creative-life-documentation approach — sharing the small aesthetic pleasures and practical projects that make daily life feel more intentional. Topics span hand-lettering and planner spreads, DIY room makeovers, thrift flips, affordable fashion, and honest reviews of the notebooks, pens, and craft supplies she actually uses. The blog began as a personal journaling project and grew into a creative-lifestyle space for readers building their own aesthetic routines, with posts that balance inspiration with the real-world budgets and time constraints of everyday hobbyists.
hey, i'm mia

tattoo lover, plant hoarder, DIY addict and overall stoner grandma
Check out the FREE Gifts. Or latest free DIY eBooks from our best compilation.
Turn off Ad Block to reveal all the secrets. Once done, hit any button:
|
|
|
|